Friday, December 4, 2009

A Prize Winning Card

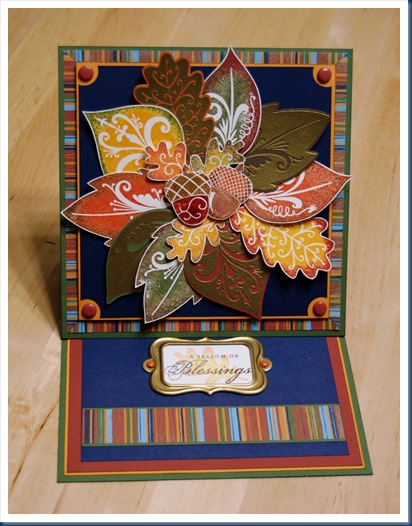
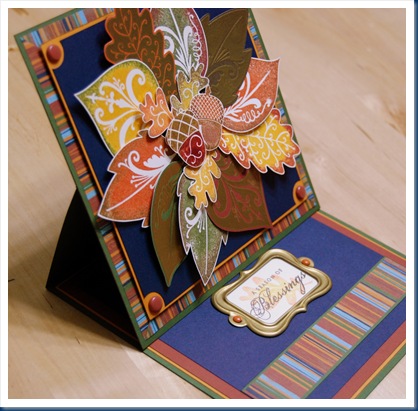
I have been urged by my good friend and fellow CTMH consultant, Dawn, to post this card, so here goes……… Despite some amazing competition, I managed to win the card contest at our recent CTMH Regional Celebration here in Portland with this little beauty. It was my first CTMH event and my head was already spinning with all the great classes and projects I was lucky enough to enjoy. This win was just the icing on the cake!!! Thanks to all my CTMH sisters who voted for my card!

DSC_0014

I have seen versions of this “easel” card all over the blogging world, so I don’t know who the original credit goes to. But whomever you are—THANKS!!!

DSC_0013

The funny thing about this card is that I wasn’t even going to buy this stamp set. CTMH has another cute leaf stamp set that also debuted in the recent Autumn/Winter Idea Book and I decided to buy it and told myself I DID NOT need another leaf set. However, one of my customers fell in love with this set and decided to order it. It happened to be delivered right before the All-Day Crop I was holding, and as soon as I saw it in person I wanted to try it out. Luckily, said customer was my mom and, of course, she let me play with it at the crop. Needless to say, I fell in love with it and this card was born (and I bought the set for myself, too). So, thanks also go out to my mom, DiAnne, for buying this set in the first place!

DSC_0011

Some of the leaves are embossed with gold on several different colors of cardstock. The other leaves are made with a technique called “stamp rolling.” To achieve this look, ink up your image with the base color (usually a lighter color), then lightly “roll” the edges of your stamp image in a second color (usually a darker color). Then stamp on your paper, as usual.

The acorns are first stamped with colored ink, then stamped again, directly over the image, with VersaMark and embossed with clear embossing powder. (Gotta love the clear stamps!) The leaves and acorns are then layered together with foam tape to give the wreath dimension.

The leaf behind the sentiment is done with the rolling technique, and then stamped “second generation.” In other words, I stamped first on scratch paper to remove most of the ink, and then again on the project. This gives the lighter, sheer look to the image. I stamped the sentiment directly over the leaf image.

Since CTMH only makes the Foundry Bookplates (Z1147) in pewter and I needed something in gold, I tried embossing them. Guess what? It worked!! Press the Bookplate into a VersaMark ink pad then emboss with gold embossing powder. If there are little nooks and crannies that don’t get covered, just touch them up with an embossing pen and more powder. Reheat and you have a gold bookplate!

The stamp set used is called Flourished Blessings (D1379) and the paper is from the set, Back Country (X7110B). I used a wide variety of colors including Outdoor Denim, New England Ivy, Autumn Terracotta, Cocoa, Honey, Goldrush, Barn Red, Chocolate, Desert Sand & Colonial White. Also in the mix are Autumn Terracotta brads & Barn Red Bigger Brads, along with the aforementioned Bookplate.

This card is a little larger than standard, 6 1/2” x 6 1/2”, to accommodate the wreath. The wreath is my own original design.

Thursday, December 3, 2009

Gift Packaging Workshop

Just in time for the Holidays!!! Join me next Thursday, December 10th at 7 p.m. to make 5 fun packaging projects (Be sure to read to the bottom of this post for information on a BONUS KIT!!) Cost is only $15!! Included in the workshop are:

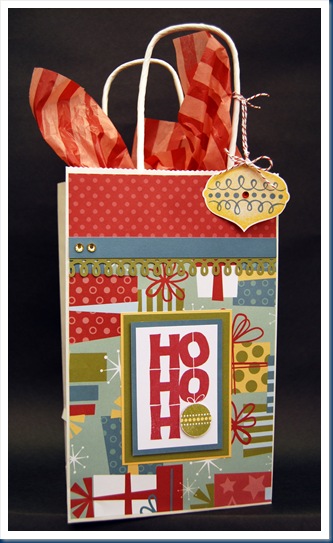
Gift bag with matching tag

DSC_0020 

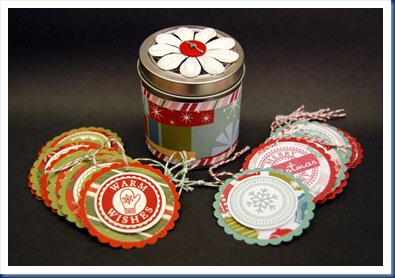
Decorative tin with 16 gift tags

DSC_0021

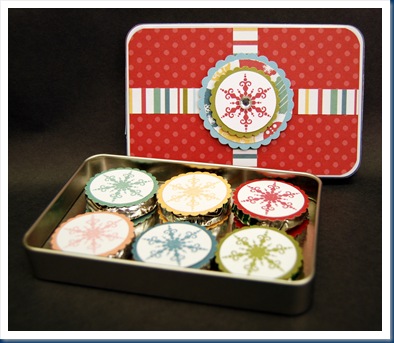
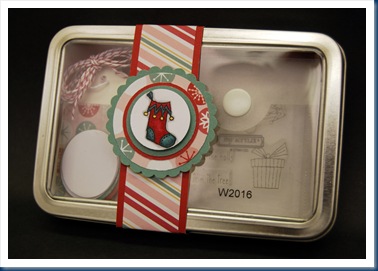
Gift card tin with 6 coordinating treats

DSC_0019    

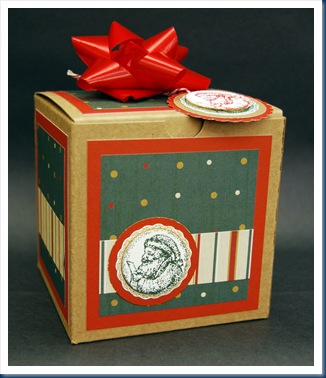
Small gift box with matching tag (box is approx. 4”x 4”x 4”)

DSC_0027

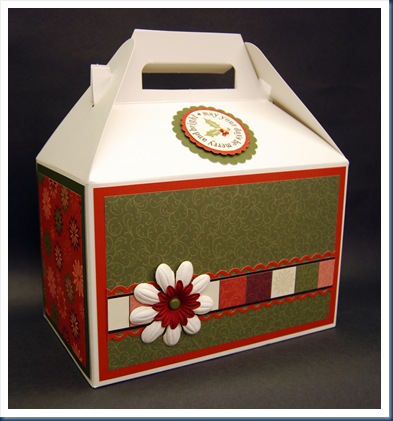
Large gift box (approx 5”x 8”x 8”)

DSC_0026 

Reserve your spot now as spaces are limited!! Your reservation and payment MUST be received NO LATER than Tuesday, December 8 so I can have all materials prepared. With 5 projects to complete in one short evening, all papers will be pre-cut so all you will need to do is stamp and glue!! So bring lots of adhesive (regular and dimensional), glue dots (both regular and mini),  and your scissors (just in case you need to trim something).

Can't make it on the 10th? No problem!! Contact me to receive all the materials needed to make these projects on your own. The basic kit of materials (unstamped) is $15. Add $5 if you would like me to stamp everything for you. Add $5 if you would like the kit shipped to you (if you are unable to pick it up in person). All kits will be ready/shipped on Saturday, December 12.
BONUS FOR THOSE ATTENDING ON DECEMBER 10th!!!

As a thank you for your business, all those attending the workshop on December 10 will receive this bonus Tag Kit. Included is an adorable mini stamp set and the materials to make 6 gift tags, all packaged in a cute tin.

DSC_0022

DSC_0023

You can contact me via e-mail at shannon.ctmh@yahoo.com (or by phone if you have my number). I hope to see you on the 10th!!

Wednesday, November 11, 2009

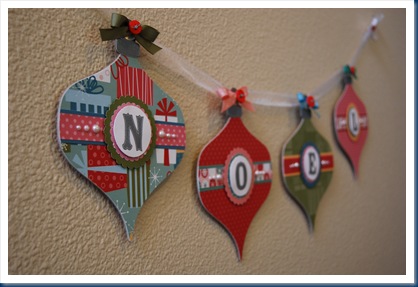
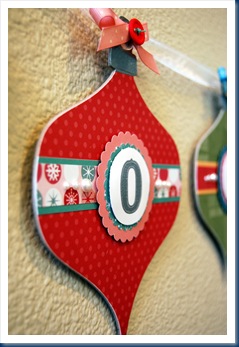
NOEL Banner Workshop

DSC_0023

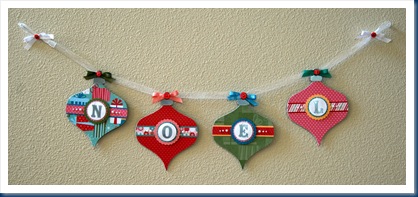
Join me on Thursday evening, November 19th at 7 p.m. to make this fun Christmas decor piece. Bring glue sticks, dimensional adhesive (foam tape/squares), sanding kit (or fine sandpaper/sanding block), scissors, and tweezers. Cost is $10, or only $5 with a $25 order, or FREE with a $50 order.

Don’t forget, it is also STAMPAGANZA month, and stamp sets are all buy 2 get one free!! Now is the time to stock up on all those great CTMH stamps you’ve been wanting. You deserve an early Christmas present!!!

DSC_0027

DSC_0028

Tuesday, October 20, 2009

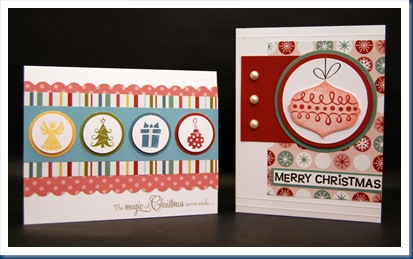
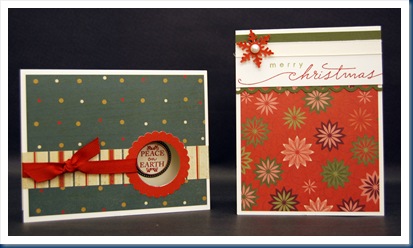
Christmas Card Workshop

Come and join me on Sunday, November 1st at 1 p.m. to make these fun cards. We will be making 5 of each for a total of 25 cards. Cost is only $30. Registration and payment due by Monday, October 26. Contact me for further details!!DSC_0009 DSC_0007  DSC_0001    

** I will post recipes after the workshop

Friday, October 16, 2009

Just a Tad Late!

Here is a card I made for my quality swap group using the September Stamp of the Month, Treasures. I made the top card originally and wasn't happy with how it looked at first. After the ink from the sentiment was dry (and darker) I decided I liked it. Unfortunately, I had already changed to the second card and made all I needed. For both cards, I stamped the flower with VersaMark ink and embossed it with clear embossing powder. Then I sponged Sorbet all over the flower and wiped the excess off that the embossing resisted. I also sponged a little bit of Crystal Blue to make it look like sky behind the flower.


On this one I stamped the sentiment with brown Staz-On OVER the embossed image. I think next time I will try stamping the sentiment directly on the card first, and then stamping and embossing OVER it. Not sure it would remain clear (to my satisfaction), but it would be worth a try!


For this version I stamped the sentiment in Chocolate on Colonial White. Then I stamped over it with VersaMark and embossed with clear embossing powder. I think I would have liked it better if I had used Cocoa instead of Chocolate. It would have been darker and stood out more. Oh well!

supplies used (all CTMH, unless noted):

  • Twitterpated Level 2 paper pack
  • Treasures stamp set(September Stamp of the Month)
  • designer ribbon rounds—sorbet
  • VersaMark ink
  • clear embossing powder

colors: sorbet, chocolate, crystal blue, sweet leaf, colonial white

size: 5 1/2” x 4 1/4”

idea from: I'm sure I saw a card with this layout somewhere, at some time............


Posted by Picasa
Thursday, October 15, 2009

More from the Grace Workshop

DSC_0024This is the second layout we did at the Grace Workshop last month. I chose not to do the “bonus” layout listed in the WOTG flyer, but instead chose one of the layouts we are allowed to copy from CTMH’s great ideas books—Reflections, Cherish, and Imagine.

I added a few things to the kit (and I provided them to all the participants, too!), such as the corduroy brads, self-adhesive pearls, and the flowers. For the title I used both Believe alphabets and the Classmate alphabet, and for the journaling block I used the Journaling Jots stamp set.

Below is the second set of card we made. Again I chose not to make the cards shown in the brochure, instead using one of the patterns we are allowed to copy from the CTMH card-making books, Originals and Wishes. The only item not from the kit on these are the self-adhesive pearls. I really hope CTMH adds them to the next catalog as a regular item!!!!

DSC_0033DSC_0034DSC_0035

Wednesday, October 14, 2009

October Stamp of the Month

Believe it or not, Christmas will be here before we know it. Now is the time to start planning and creating for the holidays. Here is a quick and easy card you can make to send to all those special people on your Christmas card list. For this card I used the October Stamp of the Month--Holiday Warmth.

Do you want to know the best things about this stamp set??? You can get it for FREE with a qualifying purchase. Just ask me how!!

supplies used (all CTMH, unless noted):

*Creative Basics--Jingle
*October Stamp of the Month--Holiday Warmth
*Twinkle Brads-Jolly Assortment
*Clear Sparkles

colors: blush, creme brulee, juniper, tulip, white daisy, black

card size: approx. 4 1/4 x 5 1/2

idea from: my original design


Here are some other projects made with this set:

Monday, October 5, 2009

Fabulous Fall Workshop Projects

Come and join me this Thursday, October 8 at 7 p.m. to make these 3 fabulous fall projects. Cost is only $5 or FREE with a $25 order!! Please RSVP by Wednesday evening. Hope to see you then!!

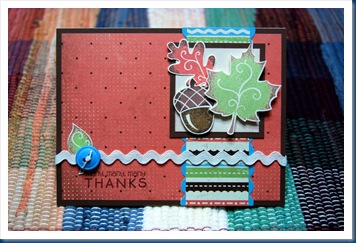
Project #1: Many Thanks card

DSC_0026

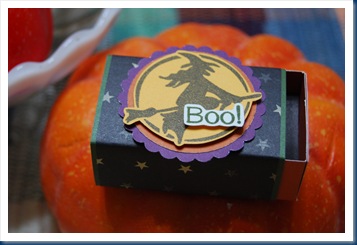
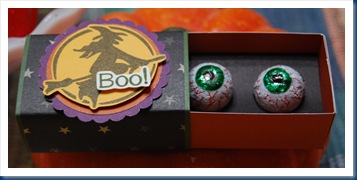
Project #2: Boo Box (with a surprise inside)

DSC_0030 DSC_0024

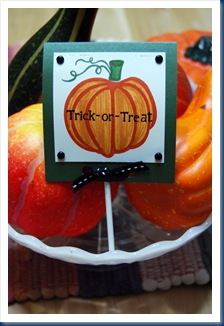
Project #3: Trick-or-Treat lollipop wrap

DSC_0025 

(I will post the recipes after the workshop on Thursday)

Tuesday, September 15, 2009

Short Notice……

Due to some changes made by Corporate Office, I have changed my scheduled Sweet Home Workshop to the Grace Workshop instead. I will probably offer the other at a later date.

DSC_0024

If you would like to join me on Thursday, September 24 at 7 p.m.  contact me right away! We will make up to 2 complete two-page layouts and 12 cards!!

I must have your registration by this Thursday, Sept. 17!! Just phone or e-mail me to sign up!!

DSC_0025

Here are the details:

Basic Option Cost: $29.95 + shipping
Basic Includes: A Level 2 paper pack, a B-sized stamp set (very cute!), a package of Edge Anchors, a full color guide, and I will be throwing in a few more sheets of paper and extra embellishments


Best Option Cost: $41.85 + FREE SHIPPING!!
Best Includes: Everything listed above plus a package of 100 Basic Buttons and Crystal Blue Waxy Flax

Either way, you will leave with your completed projects, a B-size stamp set, a full-color guide you can use over & over again, and TONS of materials to make even more cute stuff!!

Hope to see you there!!

Monday, August 31, 2009

Cute Card Tote

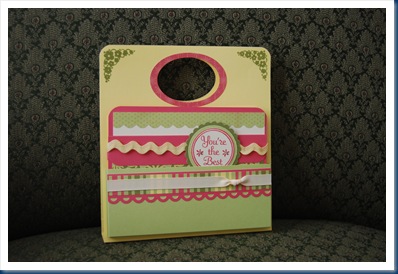
This cute little project is another find from a SU consultant’s website. I was unable to trace back to the original post, so if you know who I need to give credit to, please let me know!

DSC_0038

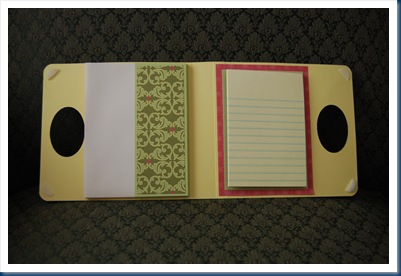
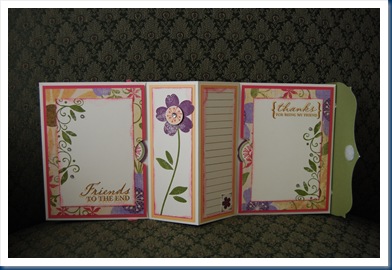
The tote is made of cardstock and is secured closed with velcro. The front and back each have a pocket that holds 2 cards, and the inside pocket holds the envelopes. The notepad is attached with velcro so it can be replaced. I think I will add a loop of cardstock to hold a pen, too.

DSC_0039

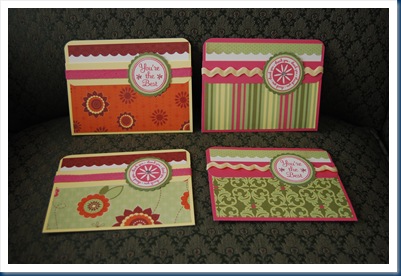
I love these pocket cards! The are so simple and easy to make. The pocket is secured only at the top by the ribbon.

DSC_0040

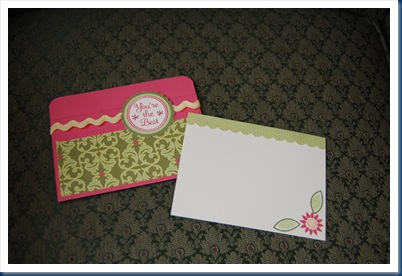
The insert leaves lots of room to write a note, or even add a small photo. I would love to get something like this in the mail!

DSC_0041

supplies used (all CTMH, unless noted):

  • Boom-Di-Ada Level 2 paper pack
  • Cottage Floral stamp set
  • Picture Perfect stamp set
  • (the sentiments are from a stamp set available to consultants only, but any circular sentiment would work)
  • sparkles—clear
  • designer ribbon rounds—hollyhock & ric rac collection
  • grosgrain ribbon—colonial white

colors: buttercup, hollyhock, olive, sweet leaf,

size: approx. 7” x 6” (closed); cards are standard 5 1/2” x 4 1/4”

idea from: a very creative SU demo—sorry I don’t know who you are!!!

Wednesday, August 19, 2009

Butterfly Wall Hanging

DSC_0109

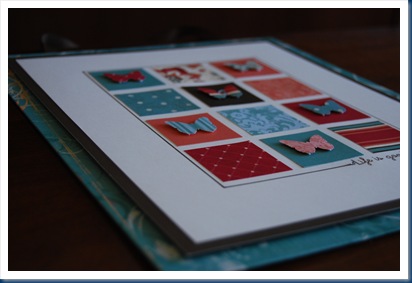
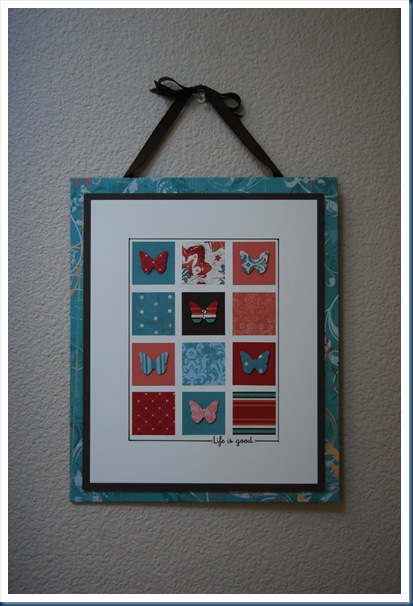
This is the project I entered for the July consultant artwork contest that CTMH holds each month. The winners were posted today, and unfortunately, I was not among them. What’s worse, is that I had to send in the original and I don’t get it back (I knew that going in—but it sure is easier to take when you win) I guess I’ll have to make myself another one!

DSC_0106

supplies used (all CTMH, unless noted):

  • Perfect Day Level 2 paper pack
  • Key to My Heart paper pack (previous special promo)
  • Treetops stamp set
  • Sparkles—clear
  • Grosgrain ribbon—cocoa
  • Butterfly punch (Martha Stewart)

colors: cocoa, juniper, sorbet, tulip, colonial white

size: approx. 9” x 11”

idea from: my original design (though I’m sure I’ve seen similar ideas elsewhere)

Thursday, August 13, 2009

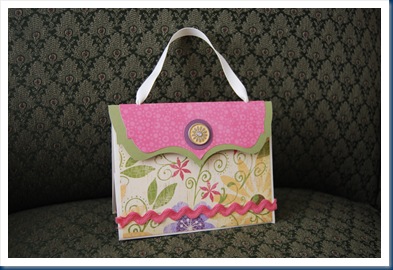
Another Purse Gift

This delightful little purse was inspired by a project on a SU demo’s blog I saw ages ago……but I have no idea who it was. If you know who originally posted this type of project, please let me know so I can give proper credit! I was also greatly inspired by my ever-so-talented CTMH sister, Lisa Stenz!

EDITED TO ADD: I found it!! Here is the original tutorial for this project: Jan’s Stamps, Paper, Scissors

DSC_0042

I love this little project and all the surprises it holds inside!

DSC_0043

I love the inserts! You could add pictures or extra journaling….

DSC_0044

supplies used (all CTMH, unless noted):

  • Bella Level 2 paper pack
  • Endless Friendship stamp set
  • Thank You stamp set
  • Journaling Jots stamp set
  • Sparkles—clear
  • Grosgrain ribbon—colonial white
  • Designer Ribbon Rounds—hollyhock
  • Connections Club—metal token
  • standard A2 envelopes (from my stash)
  • velcro dots (from my stash)

colors: hollyhock, creme brulee, olive, smokey plum, colonial white

size: approx. 4 1/4” x 5 1/2”

idea from: an unknown SU demonstrator & CTMH consultant Lisa Stenz

note: the flap for this purse was cut with my Cricut using the Storybook cartridge at 2 different sizes

Wednesday, August 5, 2009

Wow! A Rare Layout!

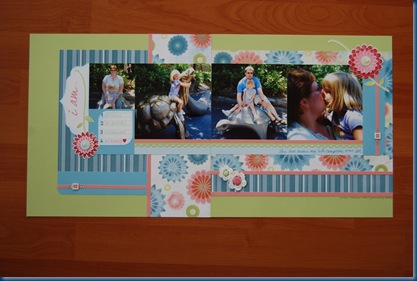
I am so bad about sitting down and creating layouts. I think it is because I am so “meticulous” and it takes me forever to complete one. Of course, the fact that I am overwhelmed with just about every product Close to My Heart sells wouldn’t be part of the problem, would it???? That’s why I was thrilled when CTMH offered the Tickled Pink scrapbooking kit as the special a few months ago—I do better when I limit my supplies and I love getting an idea from somewhere else and putting my own twist on it.

And for once, I actually got the special ahead of time and made up a sample for my customers. They loved it, and I did sell quite a few of these kits the month they were offered. Of course, it’s taken me until now to post it here, but better late than never, right??? Now I just need to make the other layouts from the kit!

DSC_0037

supplies used (all CTMH, unless noted):

  • Tickled Pink scrapbooking kit
  • I Am stamp set from above kit
  • Sans Alphabet stamp set
  • Journaling Jots stamp set
  • Tiny Typewriter stamp set
  • Bigger brads—key lime
  • Mini-Medleys—Autumn Garden
  • Clear Sparkles

colors: blush, hollyhock, sweet leaf, twilight

size: 12”x12” two-page layout

idea from: Tickled Pink scrapbooking kit guide

note: My pictures were not the same size as suggested in the guide, so I added the decorative border underneath the photos. Then to balance that out, I added the extra narrow pink strips. I also changed my background cardstock from white daisy to sweet leaf and added a few extra embellishments.

Saturday, August 1, 2009

Another Father’s Day Card

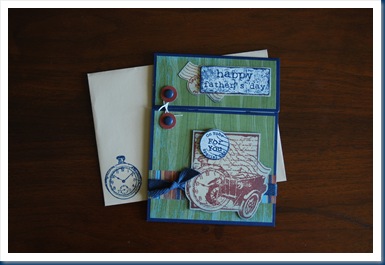
As I mentioned in yesterday’s post, here is the card I made for Mel this year. I was so excited to get this stamp set in one of the Mystery Boxes I ordered in June. It has been on my wish list for some time now. I went back to an old Idea Book to get inspiration for this card, and I am very happy with how it turned out!

DSC_0088

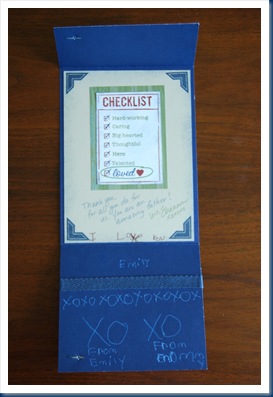
Of course, Emily had to add her own touch to the inside. The little love notes from her made Daddy smile!

DSC_0089

supplies used (all CTMH, unless noted):

  • Back Country Level 2 paper pack
  • Vintage Father’s Day stamp set
  • Checklist stamp set
  • Tiny Typewriter stamp set
  • Picture Perfect stamp set
  • Designer Ribbon Rounds—outdoor denim
  • Bigger Brads—outdoor denim
  • hemp—white

colors: outdoor denim, olive, barn red, bamboo, colonial white

size: 4 1/4” x 5 1/2”

idea from: inspired by a card in a previous CTMH Idea Book

Friday, July 31, 2009

A Project, As Promised…

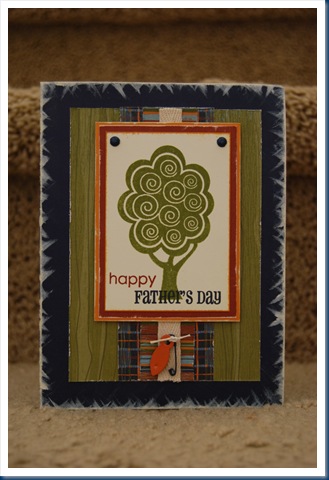
I actually was partly on the ball this year for Father’s Day. I made a card for my husband and a card for my dad (unfortunately, I did not get one done for my father-in-law—sorry Bumpo!) This is the one I made for my dad. Tune in tomorrow for the one I made for Mel!

DSC_0085

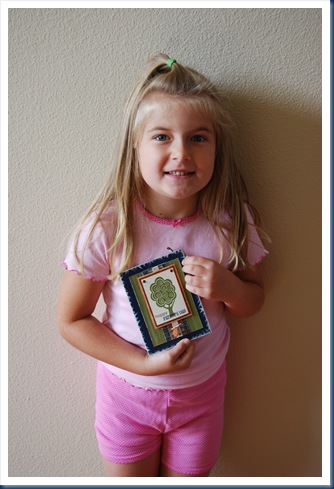
And here is a picture of it with the cutest card-giver you could ever imagine:

DSC_0087

supplies (all CTMH, unless otherwise noted):
Back Country Level 2 paper pack
Treetops stamp set
Say It in Style stamp set
twill ribbon--natural
photo clip—autumn terracotta (retired)
safety pin & brads—outdoor denim (retired)

colors: outdoor denim, autumn terracotta, goldrush, barn red, olive, colonial white

size: 4 1/4" x 5 1/2”

idea from: my original design

Thursday, July 30, 2009

Gotta Love Summer!

I know it’s been a while since I last posted, but something has been keeping us VERY busy lately--—namely this…………..

100_5435

which is just a couple of blocks away from this…………..

100_5464

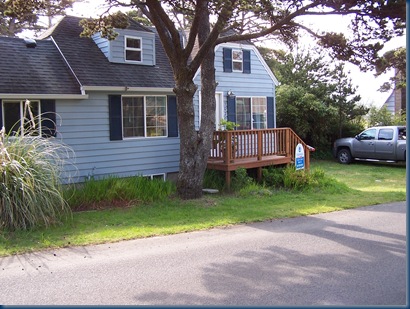
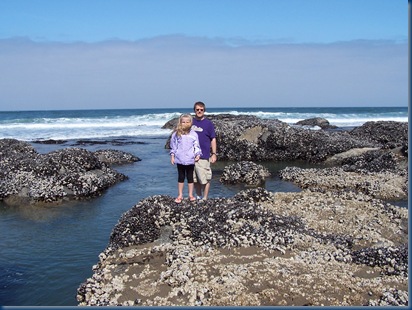
Yep, we are now the proud owners of a beautifully renovated 1930’s beach cottage and we love it! We have been spending as much time as possible there lately, especially with the unheard of high temperatures we are having in the Northwest. Today was over 105 degrees back at home (and no air conditioning at our house, so it was 94 degrees inside when Mel got home after 8 p.m. this evening), but a nice comfortable 60-some degrees here at the coast.

Unfortunately, Mel had to head back into town to work for a couple of days, but Em and I opted to stay here the rest of the week and invited one of my best friends down. Mel and my friend’s husband will be back on Friday for the weekend. Hopefully by next Monday the heat wave at home will have calmed down to a bearable temperature, as I really need to get some things done there—like cleaning and creating (in no particular order).

And believe it or not, I do have some projects ready to share over the next few days, so be sure to check back!!!

Saturday, June 6, 2009

A Prize Winning Project

This is a project I created quite a while ago and just realized I never posted it on my blog. I had submitted this to CTMH for the monthly contest for consultants and won 3rd place with it! Yay!!


mini-purse supplies (all CTMH):
Perfect Day paper pack
Annotations stamp set (previous Stamp of the Month)
Small Chocolate Alphabet stamp set
Designer Ribbon Rounds--sorbet
Cocoa bulk grosgrain ribbon
Clear Sparkles
3"x3" envelope flats

colors:
tulip, sorbet, creme brulee, juniper, cocoa, colonial white

size: approx. 3" x 3"

idea from: original idea from a SU consultant, but completely changed to make it my own!